
Are you looking for ways to add more vivid colors and create stunning visuals with Photoshop when Photo Retouching? Using the Hue and Saturation adjustment, or simply “Hue saturation” as it is sometimes referred to, can help make ordinary images look their best. In this article, we’ll explain exactly how you can use this powerful tool within Adobe Photoshop and some helpful tips for achieving superior results in no time. Read on to learn how adjusting Hue and Saturation levels will allow you to bring your photographs and digital art projects to life!
What are Hue and Saturation in Photoshop?
Hue and Saturation are essential concepts in color theory and image editing software like Photoshop. They allow you to manipulate the colors in an image by adjusting their appearance.
- Hue refers to the color itself. It represents the attribute of color that distinguishes one color from another on the color wheel. In Photoshop, the Hue slider allows you to shift an image’s entire spectrum of colors. For example, you can change a red color to appear more blue or green by adjusting its hue.
- Saturation refers to the intensity or vividness of a color. A high saturation means the color is vibrant and vivid, while a low saturation means the color is more muted or grayscale. In Photoshop, the Saturation slider allows you to control the intensity of colors in an image. By increasing the Saturation, you can make colors more vibrant and intense, while decreasing it can make colors appear more washed out and grayish.
In Photoshop, the Hue and Saturation adjustment tool is a feature that allows you to manipulate both Hue and Saturation in an image. You can use this tool to selectively adjust specific colors or the overall appearance of colors in your image. It’s commonly used for tasks like correcting color balance, enhancing specific colors, or creating artistic effects by manipulating the color palette of an image.
10 Steps to Adjust Hue and Saturation in Photoshop
To adjust Hue and Saturation in Photoshop, follow these steps:
Step 1: Open Your Image: Launch Photoshop and open the image you want to work on by going to File > Open and selecting your image file.
Step 2: Access Hue and Saturation Adjustment

- Method 1: In the top menu, navigate to Image > Adjustments > Hue/Saturation.
- Method 2: On the Layers panel, click the “Create new fill or adjustment layer” icon, and from the dropdown menu, choose Hue/Saturation.
Step 3: Hue/Saturation Dialog Box: The Hue/Saturation dialog box will appear. This is where you’ll make your adjustments.

Step 4: Adjusting Hue: Find the “Hue” slider at the top of the dialog box. Drag the slider left or right to shift the colors in your image. As you move it to the left, the colors will shift toward the more fantastic end of the spectrum (blues and greens), while moving it to the right will shift them toward the warmer end (reds and yellows).
Step 5: Adjusting Saturation: Below the “Hue” slider, you’ll see the “Saturation” slider. Dragging it to the left will decrease the intensity of colors, making them less vibrant. Dragging it to the right will increase the intensity, making colors more vivid.
Step 6: Preview and Apply Changes
- As you adjust, you’ll see the changes reflected in the image preview within the dialog box. This allows you to fine-tune the settings to achieve the desired effect.
- You can toggle the “Preview” checkbox on and off to compare the changes with the original image.
Step 7: Preserve Luminosity (Optional): A checkbox labeled “Colorize” is at the bottom of the dialog box. If you check this option, you can apply a single color overlay to the entire image. You can adjust the hue and saturation sliders to control the color of the overlay.
Step 8: Adjust Lightness (Optional): If you want to control the brightness of the colors, you can use the “Lightness” slider. Dragging it to the left will darken the colors while dragging it to the right will lighten them.
Step 9: Finalize and Apply
- Once you’re satisfied with your adjustments, click the “OK” button to apply the changes to your image.
- You’ll notice a new layer added to your Layers panel if you use an adjustment layer. This layer contains the adjustment you’ve made, allowing you to modify or remove the adjustment at any time without affecting your original image.
Step 10: Save Your Work: After making your adjustments, don’t forget to save your work by going to File > Save or File > Save As.
Remember, adjusting Hue and Saturation can dramatically alter the look and feel of your image, so it’s recommended to make subtle changes and experiment with the settings to achieve the desired visual impact.
Example of Hue and Saturation Adjustment in Photoshop
Look at this unedited image of a scene. Although pleasant, the vibrant green hue makes everything appear vibrant and lively rather than dark and foreboding.

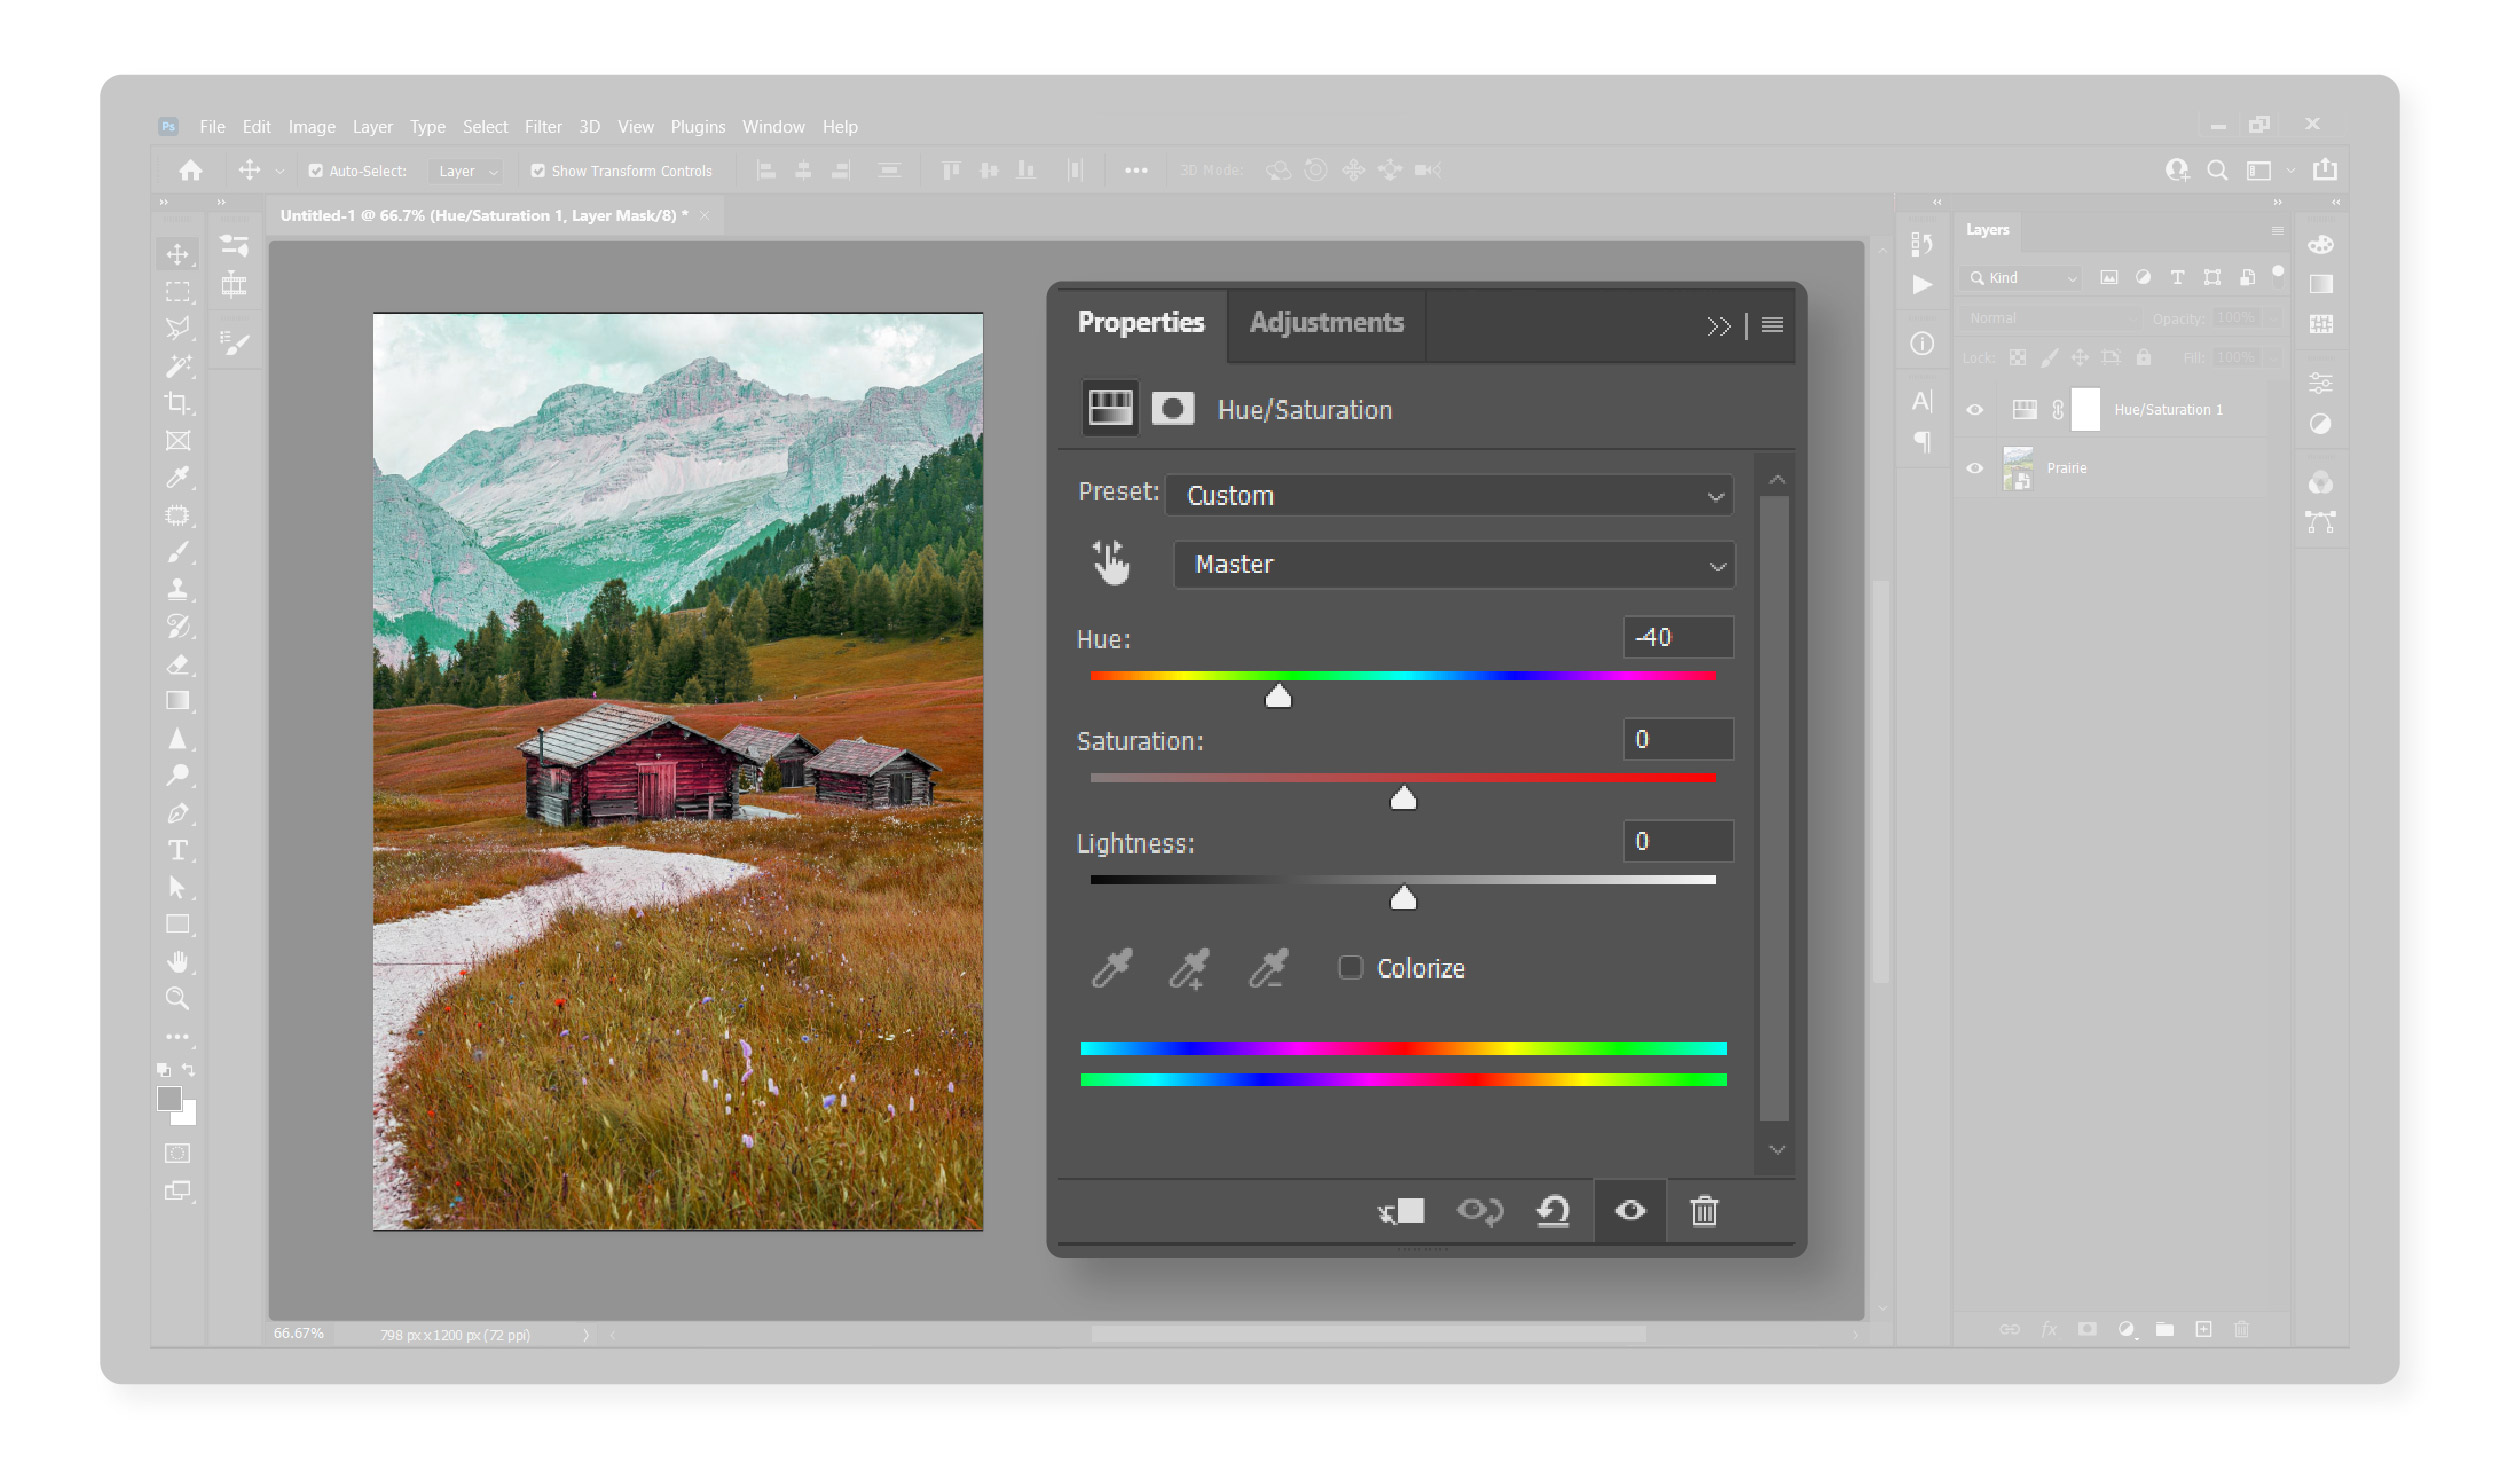
Transform your image into a mesmerizing alien landscape with just a simple slide. By adjusting the Hue slider, every hue in the image will undergo a uniform modification, resulting in a surreal and captivating sky. Look at the stunning effect achieved with the Master Hue slider set to -40.
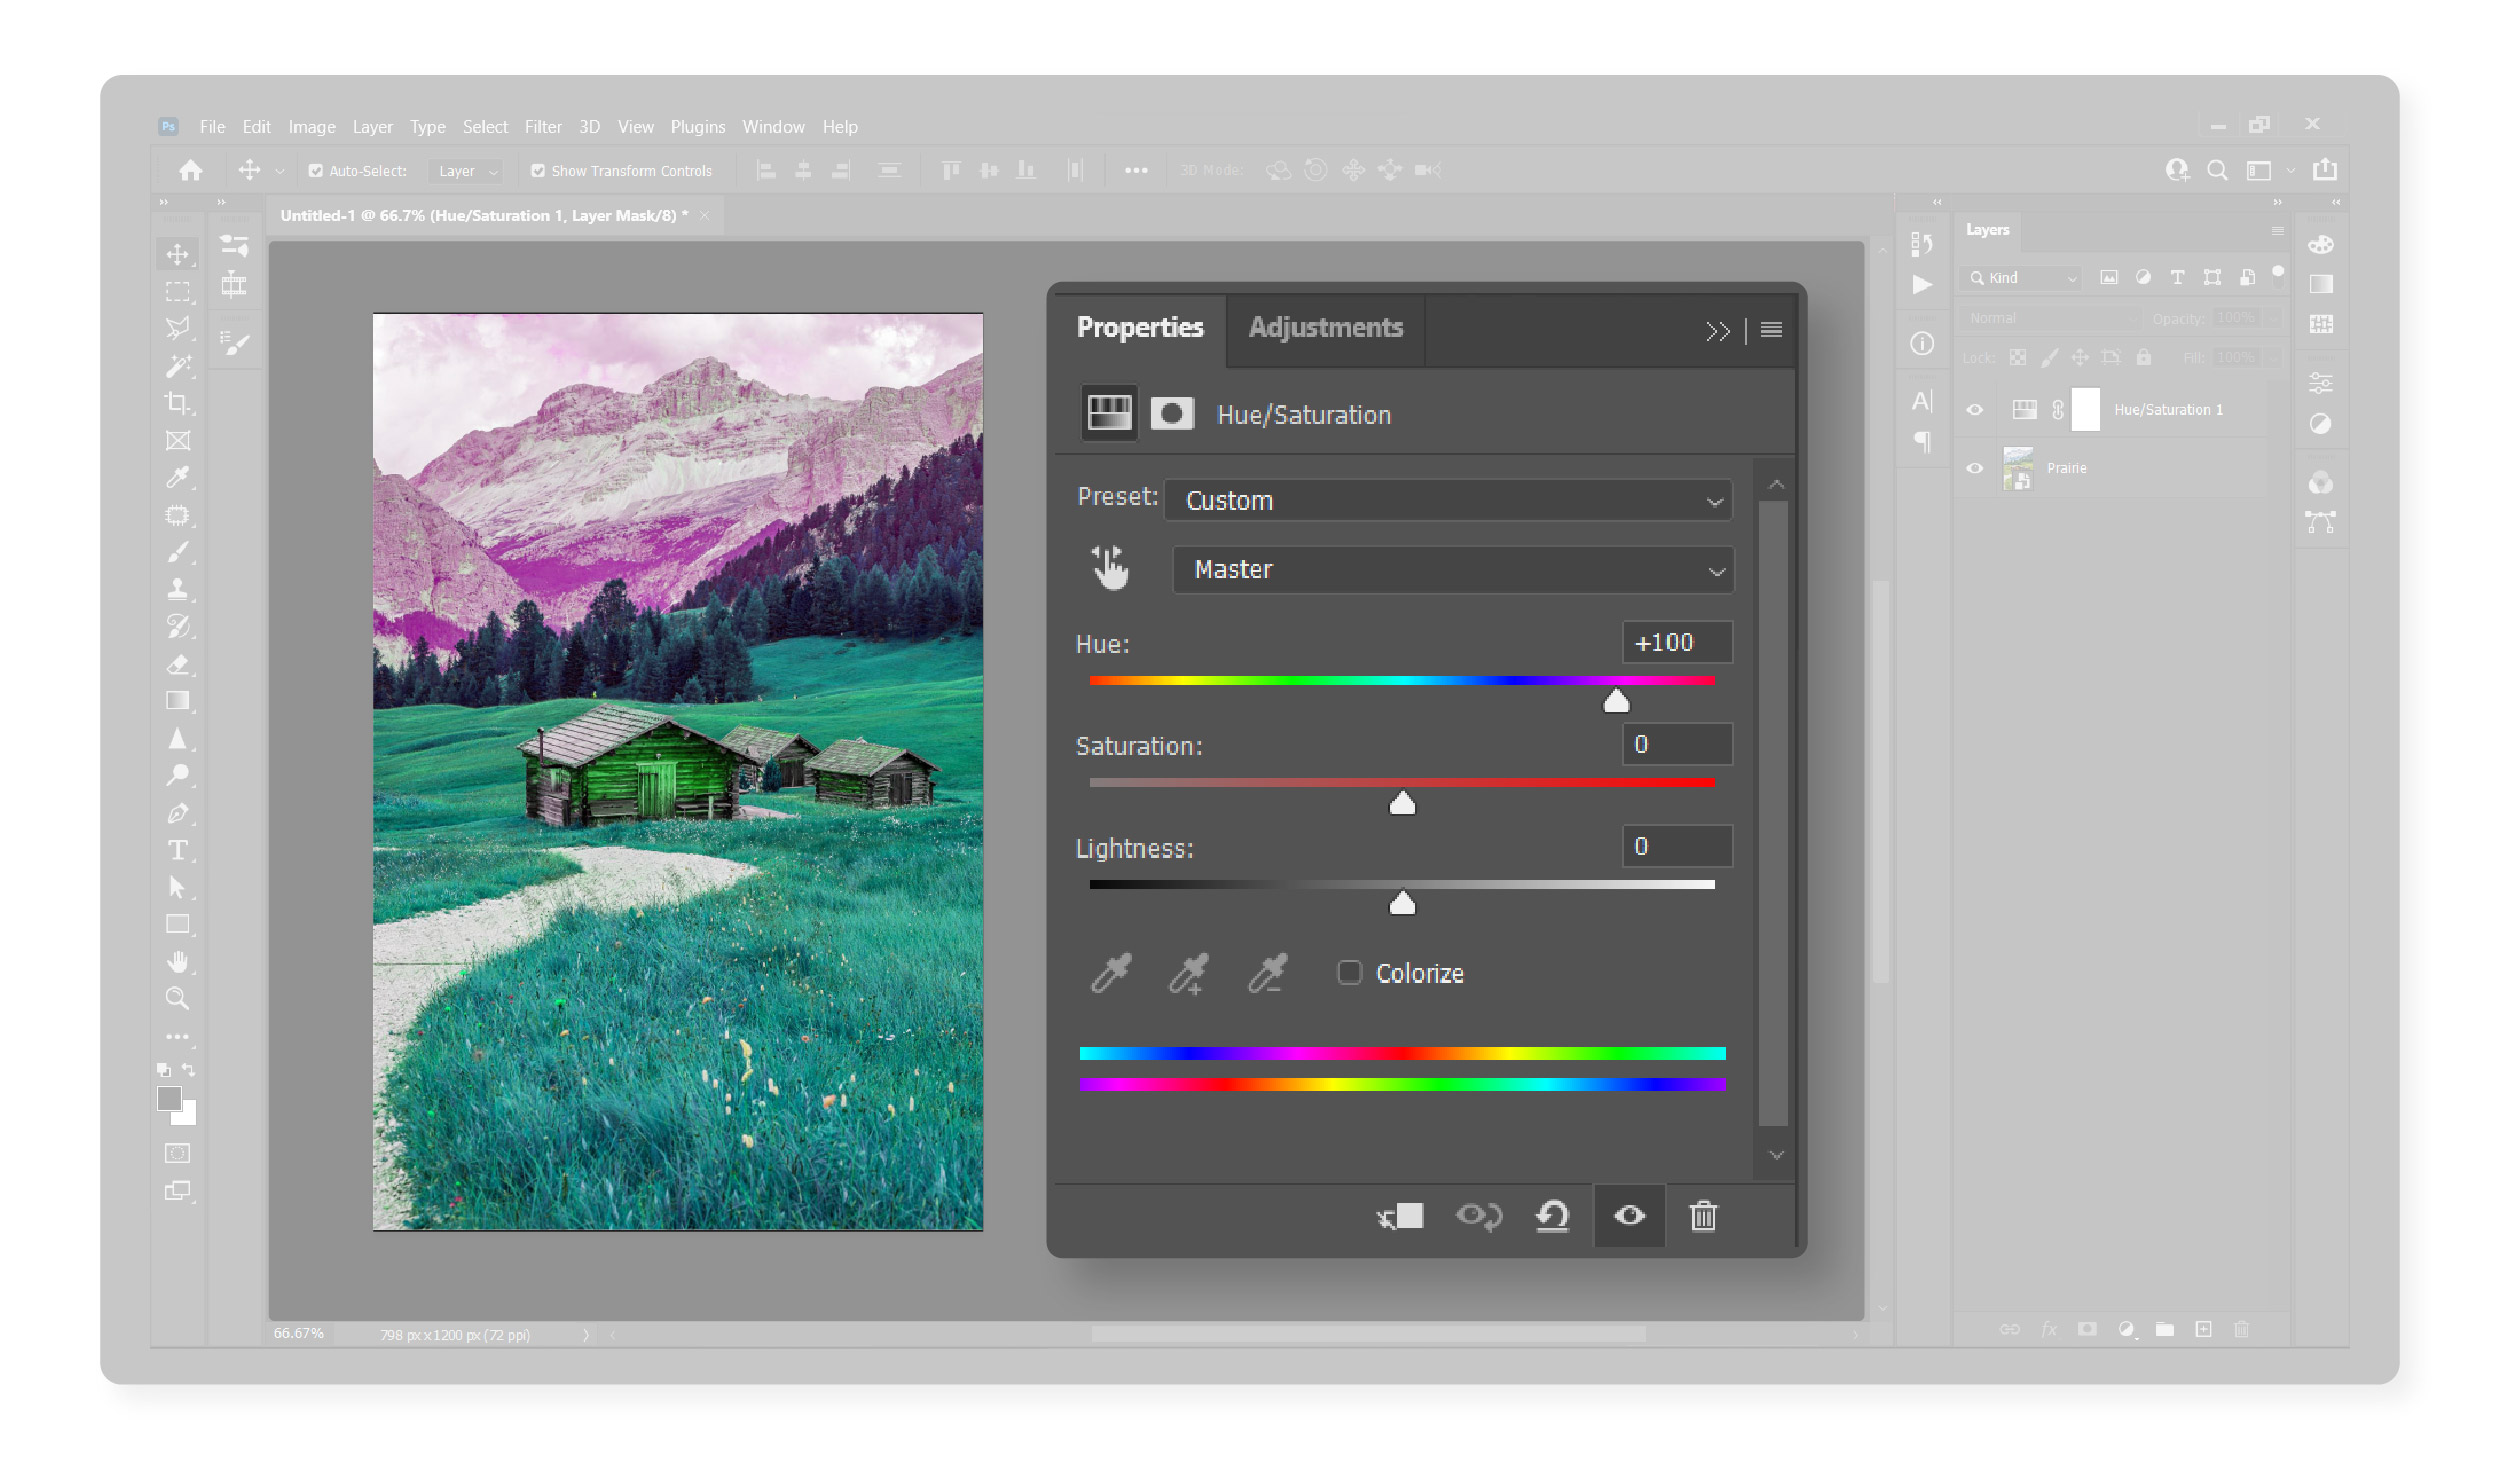
The grass may appear dry, but the unnatural green and red sky is undeniable. This effect becomes even more surreal with dramatic adjustments. Look at the same scene with the Master Hue slider set to +100.
While adjusting all the colors in an image at once may not be a common need, there are situations where you want to fine-tune the hue of specific elements without altering the entire picture.
That’s where Photoshop’s impressive feature comes in. You can selectively adjust the hue of specific color ranges to achieve the precise changes you desire. Let’s say you want to give your photo a touch of autumn by adjusting the grass and foliage to those beautiful yellow-orange tones while keeping the barn roof and sky color intact.
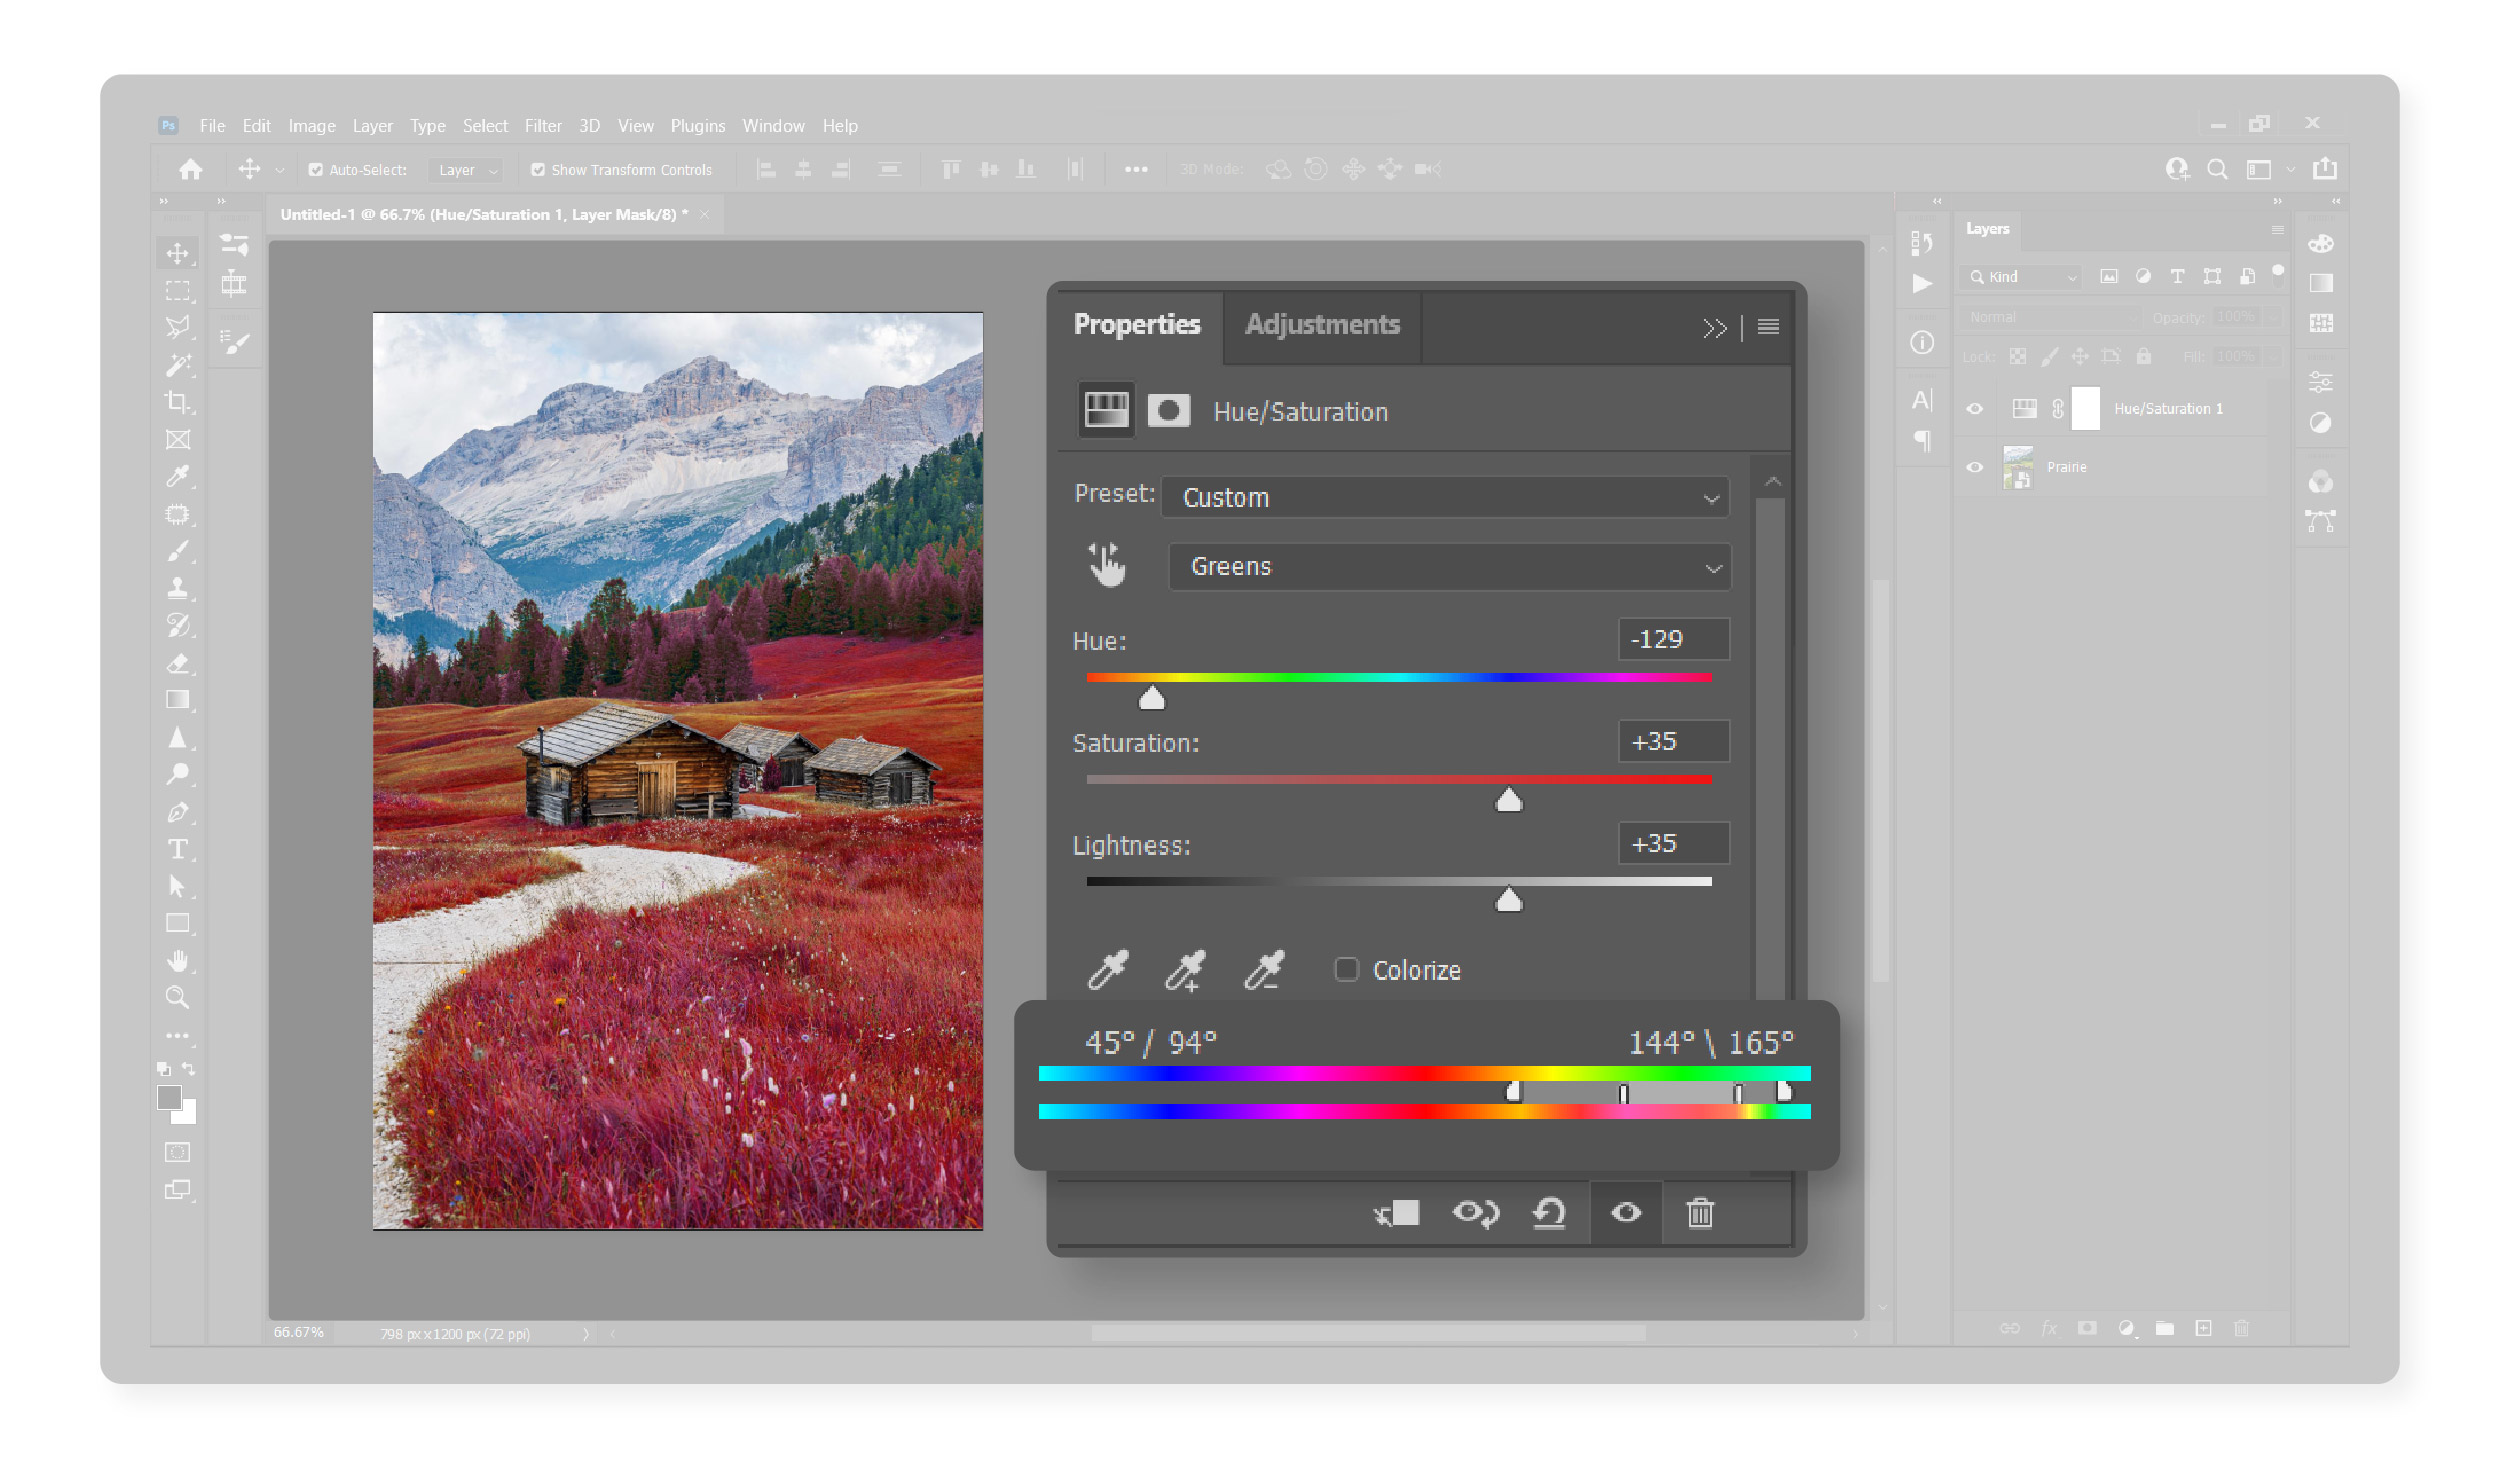
In the Properties panel, click the Master dropdown menu and discover a range of options spanning the color spectrum. For our specific goal, select Greens. Now, you can quickly and precisely control the hue changes of the selected color range.

Observe an instant transformation of the color range bars in the Properties panel. New grey markers have been included, signifying the area of the color range currently being edited. You can effortlessly adjust the affected colors by clicking and dragging these markers.
By selecting Greens instead of Master, you can effortlessly adjust the green tones of the field and trees using the Hue slider. However, it becomes apparent that the adjustment could be better, as even with an extreme Hue adjustment, the desired change is not fully achieved.

The unedited image may not accurately represent the actual color of the foliage due to limitations in the default selected color range for the Green section. While the image appears primarily green, there is a significant amount of yellow tones in the grass and foliage. By making a simple adjustment to the color range markers in the Properties panel, the grass and foliage can be adjusted to look more natural and realistic.
You can create a custom color range of any size without limitations. However, avoiding overlapping them too much is essential, or it will become confusing. I was surprised by the yellow in the green grass, showing that intuition alone is not always enough to isolate the desired range for editing. Luckily, the Properties panel offers valuable tools to simplify the process – the eyedroppers!

Effortlessly pick the correct color ranges with just a click. Locate and click the eyedropper icon in the Properties panel’s bottom left corner, and then directly select the image element you wish to modify.
Photoshop will automatically adjust the color range you’re working on to incorporate your chosen color. Additionally, you can expand or narrow this color range with the help of the plus and minus icons on the eyedropper tool, allowing you to include or exclude additional color points from your image.
Achieving Precise Hue Changes Using Layer Masks
When standard color range adjustments aren’t enough, layer masks become essential. In Photoshop, layer masks on Hue and Saturation adjustment layers function similarly to other layer masks. However, instead of controlling pixel visibility, they control the visibility of your Hue and Saturation adjustments.
The layer mask uses white pixels to show the adjustment with 100% opacity, black pixels to hide the adjustment completely, and grayscale tones for gradual gradients and smooth transitions.
To control the Hue adjustment with a layer mask, click the layer mask thumbnail in the Layers panel. The Properties panel will display the Layer Mask properties instead of the Hue and Saturation adjustment settings. Clicking the Invert button sets the mask to all-black, effectively hiding the effect.
To apply the desired Hue change, switch to the Brush tool using the keyboard shortcut B. Set the foreground color to white and paint over the areas where you want the change to be visible.
Alternatively, you can use any selection tool and fill your selection with white for the same effect, avoiding using the Brush tool.
Adjusting Hue and Saturation in Photoshop can help create stunning, vibrant images that make a lasting impression. So, whether you are a novice or an experienced user, understanding how to adjust these settings can enhance your final product. But while adjusting Hue and Saturation is essential, remember to experiment with other basic adjustments.
See more»
- What Is Photo Retouching and How It Elevates Your Visual
- Navigating Liquify Tool in Photoshop: A Comprehensive Guide
- Guide to Using the Spot Healing Brush Tool in Photoshop
- How to Sharpen Images in Photoshop: A Step-by-Step Tutorial
- What is Frequency Separation and How Can It Improve Photo Retouching
- How to Dodge and Burn in Photoshop
- A Beginner’s Walkthrough: How to Resize an Image in Photoshop
- How to Use Curves Tool in Photoshop
- How to Use Clone Stamp Tool in Photoshop: A Step-by-Step Guide


